Articles
Uploading to CloudShark using OS X Finder
4 min read
Here in the CloudShark QA Department, we use many open source tools to accelerate our testing process - Capybara, JMeter, and Vagrant are each friends and family to our QA lab. When new product development zooms past the faithful heartbeat of test automation, every QA department in the world needs to fess up - manual testing helps get the job done.
One of the most useful ways of testing future versions of CloudShark is also a way to get some extra testing for free: the robust CloudShark API allows for hands-free manipulation of CloudShark packet capture assets. The beauty of using an HTTP level API is the multitude of client support - literally every web client capable of issuing GET and POST on a file can publish to and manage a CloudShark system.
It’s probably no surprise to other developers that most of us are using OS X as our graphical workstations for development and testing. It’s true that CloudShark requires a RedHat/CentOS host operating system, but the Linux stops there - CloudShark is an HTTP service and there are many open source and commercial products shipping with CloudShark support built in. So it becomes an easy question to ask - why not OS X, literally in Finder itself?
Of course, the answer is trivial: launchd is a service management component of OS X, configured by Property Lists (.plist files). Any system command can be tied to any arbitrary component using specific Launchd concepts. Let’s define our component: A folder on the Desktop called ‘captures’, and within it, subdirectories named after CloudShark DNS hosts we want to upload files to. Important: The folder name is literally the DNS hostname of the CloudShark system we wish to use. Changing this folder name will immediately change the hostname used for the upload.
We have provided a small shell script for your inspection, curiosity, or implementation:
http://get.cloudshark.org/admin-helper-scripts/osx-launch-agent-dir-upload.sh.txt
To view this script, you can just load it right in your web browser.
Our single, fictitious CloudShark system is going to be example.cloudshark.org and our API upload token is 8d9e1eace0dbb71e8fdebc0d15810272. We can define as many CloudShark instances as we have access to, but let’s stick to a single one to start.
In a new Property List, we’re going to define a WatchPaths property for the Desktop/captures directory. It will have an associated Program property defined as a shell script. This shell script will be called whenever a change to the captures directory is made. In our shell script, we will act on files ending with the .cap suffix, ignoring the rest. Once registered with Launchd, any .cap file dropped into the proper folder will be automatically uploaded to a CloudShark system.
After the CloudShark Launchd service is registered, any packet capture file ending with .cap which is dragged into the Desktop/captures/cloudshark.example.com folder will be automatically uploaded to example.cloudshark.org.
To run this script, load up your Terminal application and run the following:
# Make the ~/bin subdirectory for holding the script.  The plist expects this location.
 mkdir ~/bin
 # Download the script from the CloudShark example scripts repository.
 # This curl command is broken into three separate lines for formatting purposes.
 curl \
   http://get.cloudshark.org/admin-helper-scripts/osx-launch-agent-dir-upload.sh.txt\
  -o ~/bin/cloudshark-upload.sh
 # Run the script in initialization mode.  This will register the service with Launchd.
 chmod u+x ~/bin/cloudshark-upload.sh
 ~/bin/cloudshark-upload.sh init
Now you just need to set up the token for example.cloudshark.org. You could do the same thing for example2.cloudshark.org with its own API token, and so on for as many systems as you have:
 mkdir $USER/Desktop/captures/example.cloudshark.org
 cd /Users/$USER/Desktop/captures/example.cloudshark.org
 echo 8d9e1eace0dbb71e8fdebc0d15810272 > token
Any .cap file dragged into the example.cloudshark.org directory will get uploaded to example.cloudshark.org using the CloudShark API token inside the ‘token’ file.
Debugging is actually fairly easy - load up the Console app, load the system log, and pay attention while you try it again. The script logs successful uploads to the Console, so you will see either uploads or Launchd failures in the same location.
A fun tip: Drag the Desktop/captures/example.cloudshark.org folder onto your Favorites sidepanel, and then you can upload a .cap file from any Finder window.

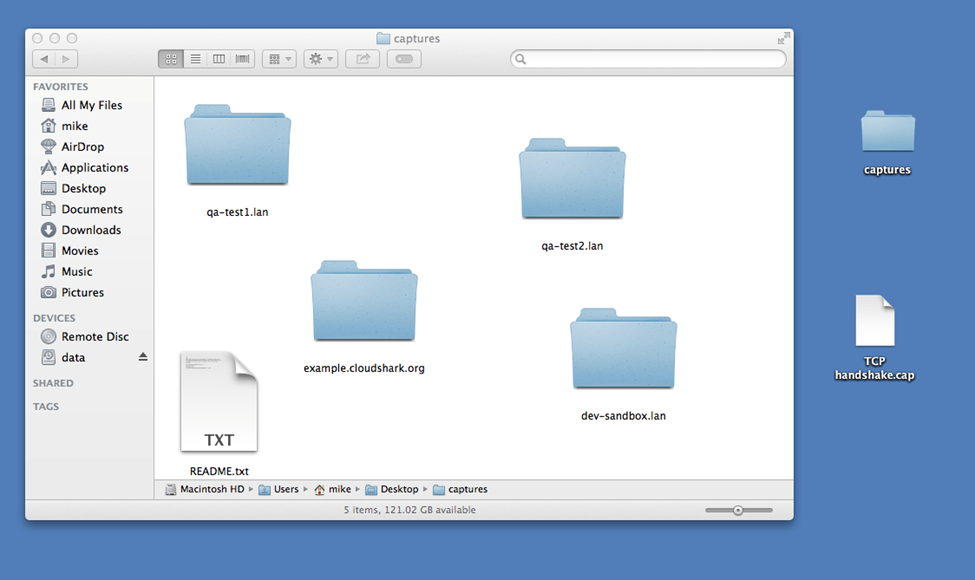
Here is a Finder window with the captures directory open - The TCP handshake.cap file can be dragged into any of these folders, which will send it to that CloudShark system
It would be rude of us to tell you all this without giving you the uninstall process. Easy:
cd /Users/$USER/Library/LaunchAgents
 launchctl unload ./org.cloudshark.watch-Desktop-captures.plist
 rm org.cloudshark.watch-Desktop-captures.plist
And there you have it - uploading packet capture files right from the Finder window. We use this here to speed up our manual testing, and hope maybe you can find a place to use it, too.
Want articles like this delivered right to your inbox?
No spam, just good networking